I absolutely understand how frustrating it may be to have a leaky bathroom that prevents you from even taking a shower. A faulty shower diverter might be one of the reasons behind this. However, It can be quickly fixed, which is a big relief, and repairing it is not a big deal.
The two ways to fix a shower diverter are to tighten it with a wrench or use vinegar to remove the debris that has built up within. Since there are two potential causes of issues with shower diverters—one is that it can be loose and may leak—and the other is that it may be clogged with filth and make it difficult for you to trigger it.
Although I have told you how to fix a shower diverter, there is still more to it that you should know, including a step-by-step repair guide.
So let us drill down into it.
What Are the Signs That Your Shower Diverter Is Faulty?
Leakage
It is a certain sign that the shower diverter is leaking if you detect water dripping from the bathtub faucet when you are actually using the showerhead. There is a reason behind this;
Your shower diverter’s inner rubber stopper is no longer effectively blocking and rerouting the flow of water because it has been exposed to water.
You will also notice low water pressure in the shower head if the shower diverter is faulty because it is not just diverting water to the showerhead but also leaking from the tub faucet.
Rusty Water
The shower diverter’s inside parts also include metal, which, when in contact with water, will obviously rust.
It is an indication that your shower diverter is faulty if you discover bits of rust or discolored, rusty water while showering or bathing.
What Leads to Leakage in a Shower Diverter?
A damaged diverter valve is the most common cause of leaks in your shower diverter. Leading up to that, the parts of your shower diverter may also begin to malfunction as they age since they lose elasticity and strength and are unable to function as effectively.
Over time, the pipes and joint valves with your shower diverter deteriorate, which can lead to leaks. The valve might possibly be rusted, or you could have installed a low-quality one and now have to deal with the consequences.
High water pressure is yet another factor in leaking. When the water reaches the shower diverter at such a fast pace, the valves can wear out over time.
How to Fix Shower Diverter in Wall — Step by Step Guide

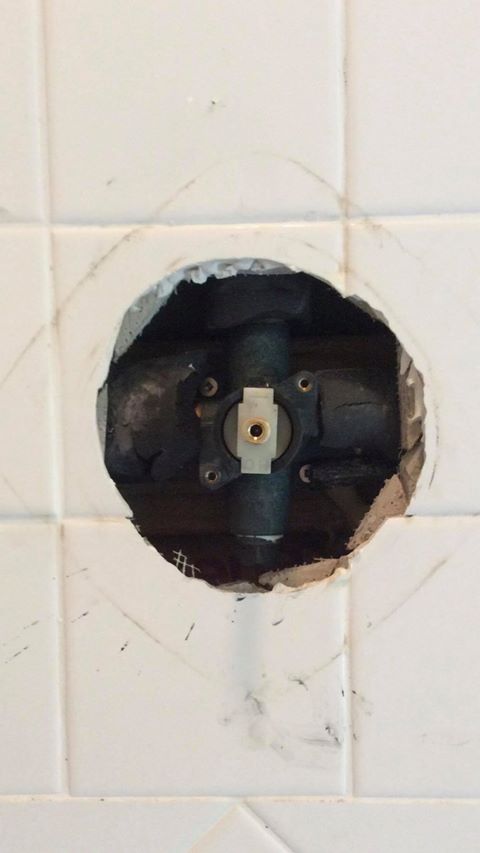
Here are the steps to fix your shower diverter in the wall:
- Before you begin, switch off the water supply to avoid any injuries while you are working to fix the shower diverter.
- You must first take precautions, therefore completely covering or sealing the drain to prevent any tiny but crucial shower diverter pieces from sliding down the drain.
- The third step is to simply tighten the screws securing the shower diverter’s faceplate in place. This is necessary because the loose shower diverter is what is causing the problem.
- In the final step, turn on the water supply again and look for leaks. You can tell if you repaired your shower diverter if there aren’t any leaks.
However, if you continue to see water trickling from your shower diverter, your only other alternative is to replace it.
- Cut off the water supply.
- Remove the entire valve after detaching the diverter.
- Swap it out for a new one.
- Use a wrench to tighten it up. But be careful not to over-tighten it.
- Reconnect the water supply and you’re all set.
Repairing a Faulty Shower Diverter — Alternative Method
Your shower diverter’s poor performance could also be caused by accumulated dirt. However, fixing it is a simple process. All you need to do is thoroughly clean it so that all the dirt buildup within is removed, and it will begin to function as intended.
Have you ever noticed that even when there aren’t any leaks or other issues, the shower diverter still produces an annoying screeching noise every time you try to turn it on?
Yes, the grease, limescale, and accumulated dirt in the faucet are to blame for that, and it results in the diverter gate becoming stuck and unable to open.
Cleaning the debris buildup in your spout with vinegar is a great trick. It is efficient and works best for removing mildew and loosening buildup. Here’s how to go about it;
- Take some white vinegar (you can mix it with water if you want).
- Place the vinegar in a plastic bag.
- Wrap the plastic bag around the spout as it soaks in the vinegar.
- After the bag has been wrapped around the spout, secure it by tying a band to the top.
- Allow it to soak for two to three days. It is preferable to let your spout soak for longer than two days if you have a severe dirt buildup in it.
- After you remove the vinegar bag, your spout will be as clean and effective as it was before it became problematic.
Another method is to use a lubrication spray to clean it. It will make it easier for the spout to work properly if it is jammed owing to accumulation. The following is a step-by-step procedure for doing so;
- To slightly loosen the knob, repeatedly pull it up and down.
- Lubricate the knob by spraying cooking spray on it.
- Return to pulling up and down until it is smooth enough to be dragged and pushed with ease.
- Finish by wiping away any excess spray!
Can a Spout Be Replaced?
The spout can be replaced if you’ve already tried to fix it using the aforementioned methods but failed. Replacing is a simple process that involves removing the old one, cleaning the area, and then installing the new one.
To replace the spout, follow the steps below.
- Turn off the water supply before you begin.
- Unscrew to remove the old spout.
- Using vinegar and a soft brush, remove the dirt from the area.
- Screw the new spout into place.
- Reconnect the water supply.
- Ensure that it is working properly.
The cleaning process must not be overlooked because it is highly crucial. If the area is clean and clear of dirt, it will help to prevent future leakage problems.
What Types of Shower Diverters Are There?
Shower diverters are classified into three types: three valve diverter, two valve diverter, and single valve diverter. Although there aren’t many differences between the three, they do differ in that each has as many handles as their name suggests.
Three Valve Diverter
There are three handles on a three valve diverter. Two of them are separate knobs for hot and cold water. It makes it easier for you if you want to mix hot and cold water together according to the desired temperatures for each.
When the hot and cold water are both at the appropriate temperatures, you turn on the third handle to start the water flowing.
The water will be routed to the showerhead if you turn the third handle in a clockwise direction. Likewise, if you turn it the other way around, you’ll have access to water in your bathtub.
Two Valve Diverter
The two valve diverter, as the name implies, has two handles. There is one larger and one smaller handle. The larger handle is a rotating one that allows you to switch between hot and cold water temperatures.
Furthermore, the smaller handle is used to direct where the water should flow; either the bathtub or the showerhead.
Single Valve Diverter
Finally, the most common diverter seen in many homes is a single valve diverter. It simply has one pull arm, which you may pull up to direct the water to the showerhead or down to the bathtub depending on how you pull the handle.
However, with a single valve diverter, you cannot manually control the water temperature. The water coming out of the faucet is hot from one side and cold from the other. It is blended to give you a mixture of both after coming in from both sides.
How to Determine Which Type Of Shower Diverter You Have?
Counting the number of faucet handles on your faucet will help you identify the sort of shower diverter you have. You can easily determine which diverter you own as the names of each diverter are the number of handles.
Other than that, you may ask your plumber to identify the one you own because they have a deep understanding of plumbing equipment and can provide you with the appropriate response.
How Long Does a Shower Diverter Last?
A high-quality shower diverter can survive for up to 15 to 20 years, but everything that lasts for a long period needs to be maintained. It is crucial that you clean it frequently and have a plumber check the area for leaks so that you can address any issues before they worsen and cause you to replace the appliance.
The first thing you need to do is to make sure that the diverter is properly installed. If it isn’t, then it will start to wear down much faster.
Once it is installed, you need to make sure that you clean it on a regular basis. At least once a month, you should use mild detergent and a soft cloth to wipe down the diverter. This will remove any soap scum or dirt that has built up on it.
If you notice that the diverter is starting to stick or isn’t working as well as it used to, then you can disassemble it and lubricate the moving parts with light oil. This will help to keep it working smoothly for many more years.
Conclusion
It is quite simple for you to fix your damaged shower diverter because you have all the knowledge you need, are aware of the several types of shower diverters, and know which one you now own.
Furthermore, now that you are aware of the causes of a defective shower diverter, be sure to take precautions now to avoid problems in the future.

Amos Christen graduated with a bachelor’s degree in Interior Design from Drexel University — Philadelphia, PA. Since 2003, Amos has worked with top interior design professionals in this area, including architects and interior/graphic/lighting designers. As a skilled interior designer, Amos Christen is highly versed in fine arts and crafts and uses that to supplement his main area of expertise. He often publishes articles related to home décor on several websites, including Sprucetoilets.com, Sprucebathroom.com, and Mybesuitedhome.com. He also contributes to leading interior design magazines.
