A leaking toilet can cause a lot of damage to your home. It can waste water, which can lead to higher water bills, and it can also damage your flooring and other parts of your home. In this guide, we will teach you how to test your toilet for leaks so that you can fix the problem as soon as possible.
Generally, you can perform two tests for diagnosing the silent leaks in your toilet. They include the color dye test and pencil test. In the color dye test, you have to put a few drops of food coloring in the toilet tank and see if the color appears in the bowl. In the pencil test, you mark the water level of the tank on the rear wall facing the tank and check if the water level drops below that line after some time.
Now, let’s talk about how you can perform these tests in detail. Then, we can discuss how you can fix the leaks.
2 Common Tests for Silent Toilet Leaks
If you suspect having a leaking toilet, the first thing you need to do is test it for silent leaks. There are two ways to do this: the color dye test and the pencil test.
Test 1: Color Dye Test:
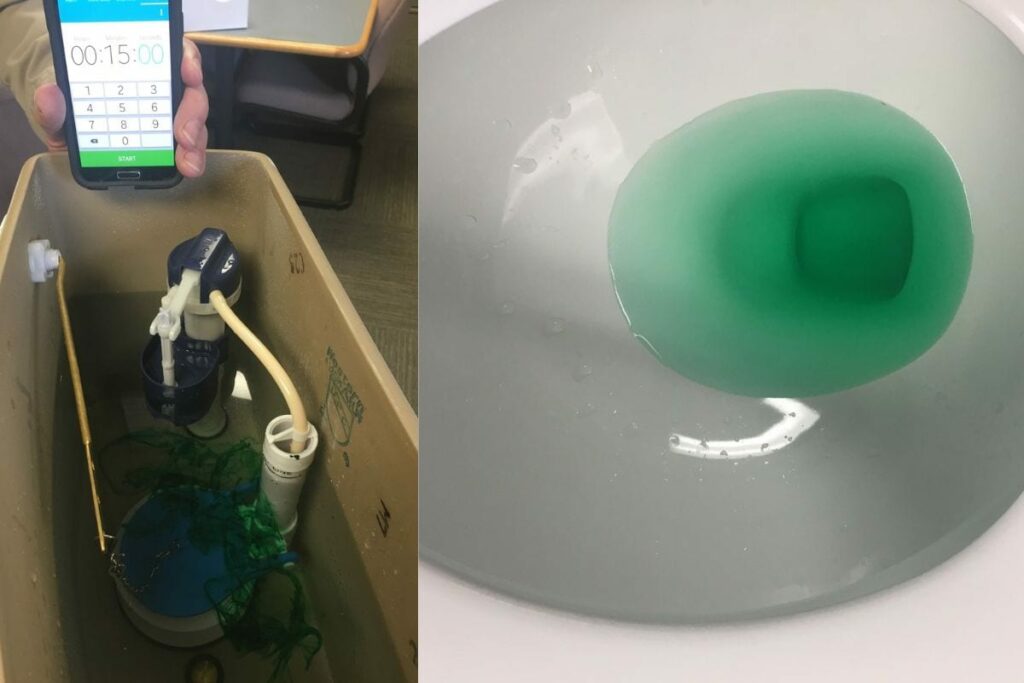
To perform the color dye test, you need to take off the tank’s lid to expose its water. Then, add a few drops of food coloring to the toilet tank. This color should be dark so that it’s distinguishable.

Once you add the color, let it stay there. Wait for 15 minutes; don’t flush the tank.
Now, check the toilet bowl to see if the color has appeared. If it has, then there is a leak.
Test 2: Pencil Test:
Like the previous test, again you will need to take off the tank’s lid.
In this simple test, all you need is a pencil to discover if your toilet is leaking. Draw a line between the back wall of the tank and the internal waterline using your pencil.
Wait 30 minutes with the water off. If the water level dips below the pencil mark, the flush valve or fill tube is to blame for the leak.
Apart from these two tests, sometimes the toilet leaks are quite visible. You will see the water moving from the sides of the toilet bowl after flushing or water around the base of the toilet.
What causes the Toilet Tank to Leak?
Now, since you have tested for the leaks in the tank, you need to know the real culprits behind these leaks, which include a bad flapper, and gasket.

#1 Bad Flapper
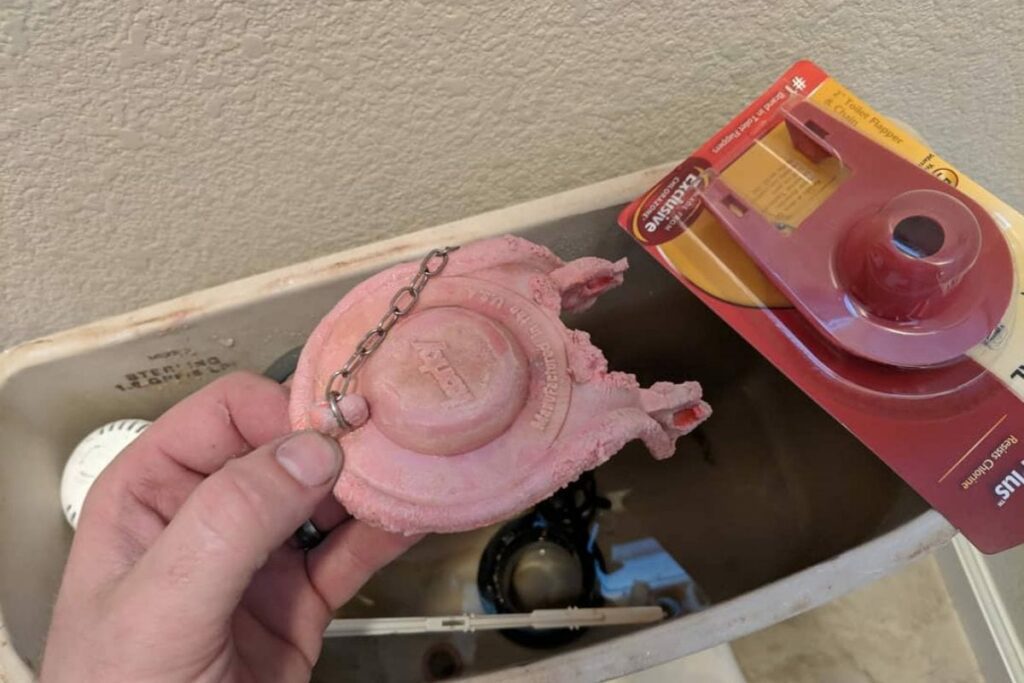
In the food coloring test, if the dye’s color appears in the bowl after flushing, it means that you have a bad flapper. The purpose of a flapper is to seal the tank after the water is flushed out and before more water enters.
If it doesn’t seal properly or if is something wrong with the chain, it will cause your toilet to leak. You can fix this by replacing the flapper.
#2 Tank-to-bowl Gasket
The tank-to-bowl gasket is a rubber gasket that seals the connection between the bottom of the tank and the top of the bowl. Over time, it can become cracked or warped, which will cause your toilet to leak.
How to find out if the toilet Bowl is leaking?
Apart from the silent leaking of water in a toilet tank, the toilet bowl may also leak. However, the leaks and signs are quite visible this time. Some signs of a leaking toilet bowl include a damp floor, strange noises from the toilet, and cracks in the bowl.

# 1 Damp Floor Around the Toilet
The most common sign that your toilet bowl is leaking is the damp floor around the toilet base. When you see water on the floor near the toilet, it means that your wax ring has failed, or there is a crack in the flange.
#2 Strange Noises from Toilet
Apart from flushing, if you hear strange noises from the toilet, like the water moving sound (even when you haven’t flushed). They indicate there is a leak in the toilet.

#3 Cracks on the Bowl
Cracks in the bowl also indicate leakage through the toilet bowls. These cracks can be caused by many things, such as a bad installation, impact damage, or age.
How to fix a leaking Toilet?
Once you have located the source of leaks in the toilet, the next step is repairing. To prevent the leaks, you can replace the bad flapper or toilet gasket or change the whole toilet in case it has cracks.
Fix the bad flapper
A bad flapper is a common reason for the toilet tank leaking. However, you can replace it in a few simple steps.
- Rotate the shut-off valve clockwise to cut the water supply.
- Take off the tank’s covering.
- Flush the tank to drain the water. Some water might remain in the bottom of the tank. Using a cloth, remove it.
- Look at the bottom of the tank, you will find a flapper.
- Unclip from its chain, and remove it from the pegs holding it in place.
- Clean the area, and place a new flapper.
- Clip it to the chain.
- Place the lid back, and rotate the shut-off valve counterclockwise to restore the supply.
Replace Tank-to-bowl Gasket
If the toilet leaks from the area in between the tank and bowl, then the gasket needs replacement. It is relatively a difficult task, however, if you follow the appropriate you will be to do it yourself.

- To begin, close the toilet tank’s shutoff valve, which is normally found on the back wall opposite the tank. Turn it clockwise to turn it off.
- Now, look for the supply line attached to the toilet, and detach it from the tank.
- Flush the tank’s water supply. Remove the cover from the tank.
- Using a sponge, wring out the remaining water and pour it into the bucket and make sure no water left is behind.
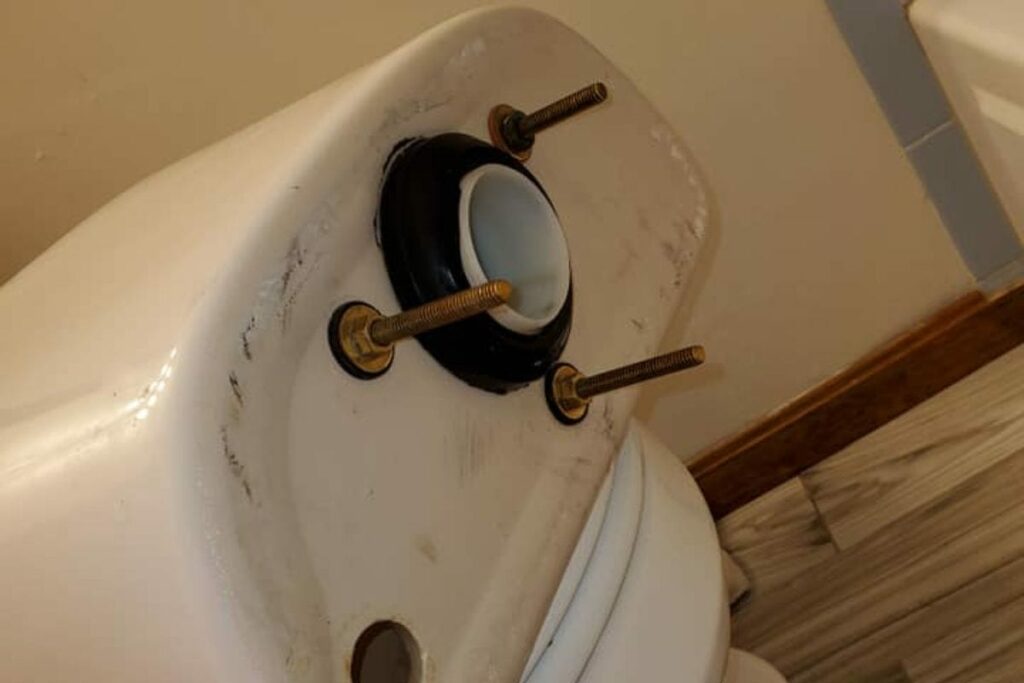
- Once the tank has been cleared, look for the bolt heads at the very bottom. They are fastened with nuts outside, beneath the tank.
- Remove the nuts from underneath using a wrench.
- Once the nuts are removed tank is free, lift it and remove the gasket. Place the new gasket in its place.
- Insert the tank back in its place by re-adding the nuts and bolts. Make sure the tank sits perfectly on the bowl.
- Re-reattach the supply and rotate the shut valve clockwise to restore the water supply.
Ensure that the toilet flapper and fill valve did not move during the repair.
Replace the Wax ring
If the toilet leaks from the base, then the wax ring attached to the flange is probably at fault. For removing the worn-out ring, the whole toilet has to be taken aside. So, this may seem to be a challenging job for you. In case, you want to try, we have mentioned the steps.
- Find the toilet’s shut-off valve and turn it off. It’s mostly on the left side of the back wall of the toilet.
- Next, flush the tank to remove all of the water. Remove the tank’s cover to check for any remaining water. You may use a sponge to soak up any remaining water and then compress it into a bucket.
- Locate the supply line that is attached to the tank’s shut-off valve from the tank’s bottom. Disconnect it.
- You must first drain the bowl of water before removing the toilet as a whole. Because taking out a toilet that is already full of sewage water would just make things messier. Put on gloves and get a sponge since the water is filthy.
- To remove the toilet, you’ll need to find the bolts on the sides and the bottom. There are plastic coverings on some of the bolts. The screwdriver can be used to remove the caps.
- With a wrench, loosen the nuts. Then, you may effortlessly remove them with your hands.
- Carefully place the toilet on one side. To prevent the spread of sewage odors, slip a towel into the drain pipe.
- Remove the old, worn-out wax ring from the toilet’s flange.
- Inspect the flange and see if it’s damaged. You may easily replace it at this time if it’s needed.
- Dip the wax ring in warm water if you want it to fit comfortably. Attach the ring to the flange’s top.
- Assemble the toilet by raising it over the toilet flange and lowering it slowly to line up the two holes in the toilet with the bolts. An additional person will be required for correct alignment. Shake and carefully press the toilet down into the wax seal while holding it by the bowl with both hands.
- Tighten the bolts with a wrench after they have been inserted into their corresponding holes.
- To re-establish water flow, reattach the tank’s water line and switch on its shutoff valve.

Replace the Complete Toilet
In case, the toilet leaks from multiple points, and most importantly there are cracks in the toilet bowl. Then, you have to replace the whole toilet.
Replacing a toilet is not an easy task for you; you may need professional help. However, if you plan to do it yourself, the procedure is almost similar to what we followed for replacing the wax ring.
Final Words
Toilet leaks are a common occurrence. However, to prevent water wastage and potential damage to your toilet, it is in your best interest to act as soon as you find the leakage. We hope that this guide has helped you test your toilet for leaks. In some cases, you can fix the problem yourself. But if you think, the issue is beyond your control, it is always good to consult an expert plumber.

Amos Christen graduated with a bachelor’s degree in Interior Design from Drexel University — Philadelphia, PA. Since 2003, Amos has worked with top interior design professionals in this area, including architects and interior/graphic/lighting designers. As a skilled interior designer, Amos Christen is highly versed in fine arts and crafts and uses that to supplement his main area of expertise. He often publishes articles related to home décor on several websites, including Sprucetoilets.com, Sprucebathroom.com, and Mybesuitedhome.com. He also contributes to leading interior design magazines.
